Home » Posts tagged 'antenna'
Tag Archives: antenna
A New Addition
 I used to be able to use a simple dipole and a vertical on the roof of my QTH here in Gozo however, last year someone decided to block the takeoff to the north and northwest with a block of flats 😦
So clearly some action was needed on the antenna front! I had been looking at what might fit the bill and eventually chose the 9H5DX Hexbeam since it is built to withstand local conditions. Here in Gozo, the sun is extremely strong much of the year and the spreaders of the hexbeam need to be protected from ultraviolet light otherwise the fibreglass deteriorates. Mike paints the spreaders with several coats of good paint. The other weather feature of life here is the wind. In the summer, Force 7 gales come along every other week, it seems and since we live on top of a hill, the wind can be even higher than forecast so a robust antenna is essential. Mike (9H5DX) leaves his antenna up all winter when the winds can be really extreme but the antenna survives.

 So I ordered the antenna from Mike and collected it last week. It goes together very quickly and everything fitted really well.Even although I was assembling it on the top of the roof in confined spaces, it was really quite easy and I don’t think I spent more than an hour including moving everything up to the roof.
The hardest part was waiting for the wind to drop so I could mount the antenna on the end of the 2in pole!
Eventually it did drop enough and up she went, coax connected and it was time to go downstairs and measure the result.

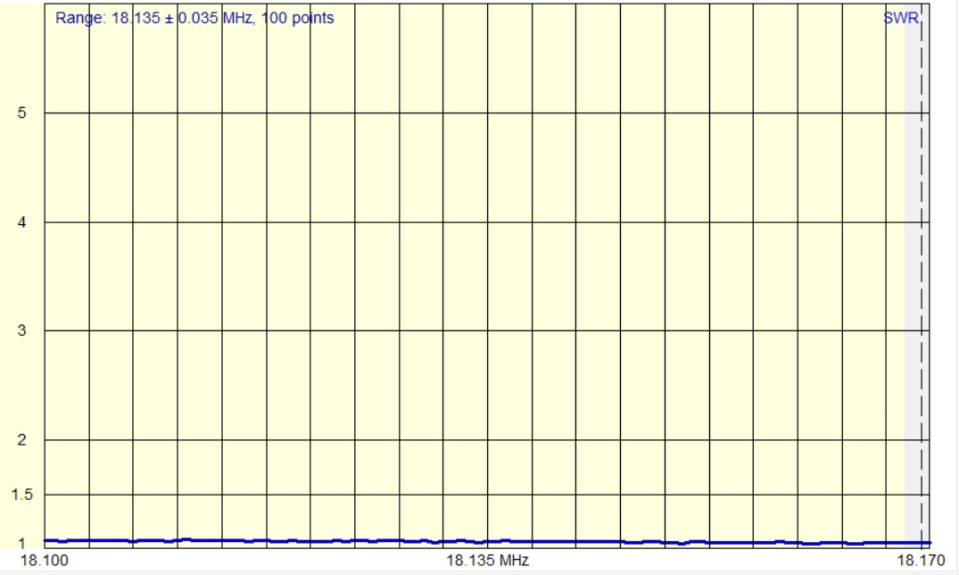


Not at all. A bit of tweaking on 6m maybe but that’s all.
Nice antenna Mike – thanks!

A Convenient 10m Antenna
I had an email from, Francesco, IK0FUX, who was interested in the antenna I was using for my 10m QSOs. So I thought I’d just put it here for everyone to see.
It’s a cheeky little number made from 75 ohm coax. I got the design I an email from the RSGB a few years ago and it has been my travelling antenna since then. I recently discovered that I could also use it at low power on 12m as I captured a cheeky RTTY QSO with another DXpedition – I don’t recommend this – my K3 was tolerant – your mileage may vary as they say. I’ve taken the liberty of copying some parts of the RSGB article below.

Anyway, here is the design. Apparently it’s called an RFD (Resonant Feedline Dipole) and it consists of a quarter wave wire connected to the inner of a 1/4 wave of coax and fed through a choke at the base of the coax. The current on the inner conductor of the coax continues right on up the quarter-wave wire. The current on the inside of the shield now goes back down the outside of the shield.
Now, we want it to stop after going a quarter-wave down the shield.
To do that we put a high impedance choke in its path by winding the
coax into a coil. This does not affect the signal coming down the inside of the cable, but it stops the flow on the outside of the shield. You can also use a choke from G3TXQs web site.
The quarter wave wire cut for 28.5MHz should in theory be 2.63m long. In reality, and if we are using PVC-coated wire (which has a lower
velocity factor) you should really cut it at about 2.5m. You may find that you need to fold it over a little to bring the low SWR point to where you want it in the 10m band once it is installed.
We then solder the quarter wave wire to the INNER of the coax feedline, leaving the outer braid connected to nothing.
Now, we measure 2.5m down the coax and start to create our choke. At this point get hold of a cylinder with a diameter of about about 4.25 inches (112 mm). I used a plastic container I found in the kitchen. Now lay some pre-cut eight-inch strips of gaffer or duct tape on the container with the
adhesive side pointing outwards. You now start winding your choke onto the former – keeping it nice and neat with no space between the turns. In total you need five turns and then you can tape the whole thing neatly together using the gaffer tape. I also superglue the turns together since I found tape tends to stretch and move in high temperatures.
I use this antenna on a 12m spiderpole to elevate it as high as possible, in 9H I use it on top of out block of Flats on an 8m pole. It should have a very low takeoff angle on 10m and I’ve had success working VK long path from C6 (his claim – I guess he has a beam 😃). Either way, signal reports are consistently good but better than the signal reports I can give from it which indicates it may be a little deaf. However, it’s an excellent, robust, portable antenna and if you seal the coax ends then it should not degrade in the weather it’s moisture ingress and the like.
Good luck and Merry Christmas!
A Hiking We Will Go!
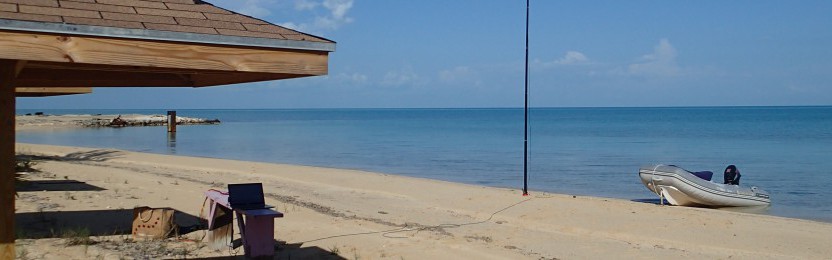
Sunday was a calmer day here in the Bahamas so I decided to get going early in order to try to work Europe on 10m. My previous QTH has a small hill in the way and I wanted to give Europe the best shot I could.

In retrospect, I didn’t get going early enough but more of that later.
I decided to go to the tip of Stocking Island on a cliff that has an uninterrupted takeoff for Europe. I had already scoped out the site on no walk. The terrain was not to steep but it turned out to be quite challenging to set up the spiderpole even although the wind was very light.


The problem is that the rock is eroded limestone and extremely rough and jagged. That meant that no matter how carefully I laid out the guy lines, they always seemed to catch on something when the pole was almost up. So I had to put it up and down maybe 5 or 6 times before I managed to get it vertical without snagging at least one of the guy lines. Eventually, I got it up to my satisfaction, connected the rig and battery and selected 10m only to find S8 noise 😦 Perhaps this wasn’t going to work out too well….
After a while I managed to work some of the strongest European stations, a selection of Caribbean stations, ZA and my friend Michael, 9H5DX from Malta. All in all, 87 QSOs in 95 minutes but it was quite hard work.
In retrospect, I learned a few lessons.
1. Start early – you don’t want to miss a band opening by not being ready. The struggle with the antenna cost me 1/2 an hour of operating.
2. Take plenty of water and some headache tablets. I had perspired way more than I had planned when putting up the antenna. I had a bottle of water with me but not nearly enough. The result was that I had a bad headache after about 45 minutes of operating and deteriorating conditions at the 90 minute point coupled with the pounding head forced me to go QRT.
3. Spiderpoles hold water. The spiderpole is a well finished piece of gear but it has a few downsides that are common to poles in general. In sub-tropical regions, the wind is salt-laden. The salt ends up on the pole. That’s fine until the pole has been up for a few days and you take it down and store it. When you take it out again, you start to extend it and find that it’s soaking wet – the salt has attracted moisture which has drained to the bottom of the pole. If, like me you have taped the bottom cup onto the pole, you decide to drain the pole and find there’s a cup of water in the bottom. Worse still, you now need to dry the pole with your Tshirt or the tape that holds the antenna won’t stick.
Well, that’s enough for now. It was still a fun morning on the radio and nice to work some friends, old and new.
73 for now!
